Thursday, December 19, 2013

21 Day Sugar Detox Cookbook!

I'm finally writing another post after taking an extremely long break. I've been so busy lately with Thanksgiving, getting ready for Christmas, physical therapy, other doctor's visits, and dealing cards, that I haven't had time to blog at all. The holidays always end up being somewhat stressful for me.

Speaking of the holidays, this is the time when many of us throw caution to the wind and splurge on all the treats and goodies we can get our hands on. I've done it and am currently doing it (I blame stress...). I love my pumpkin pie, dark chocolate, egg nog with a little bourbon, and my favorite peppermint-swirl ice cream. Needless to say, I'm going to need some serious detoxing come January to get myself back on track. The way I figure, I'm going to join the largest group ever doing the 21 Day Sugar Detox on January 6th and reconquer my cravings.

I posted a rave review a while back of the 21 Day Sugar Detox book.  Well... I now have the honor of reviewing the 21 Day Sugar Detox Cookbook.


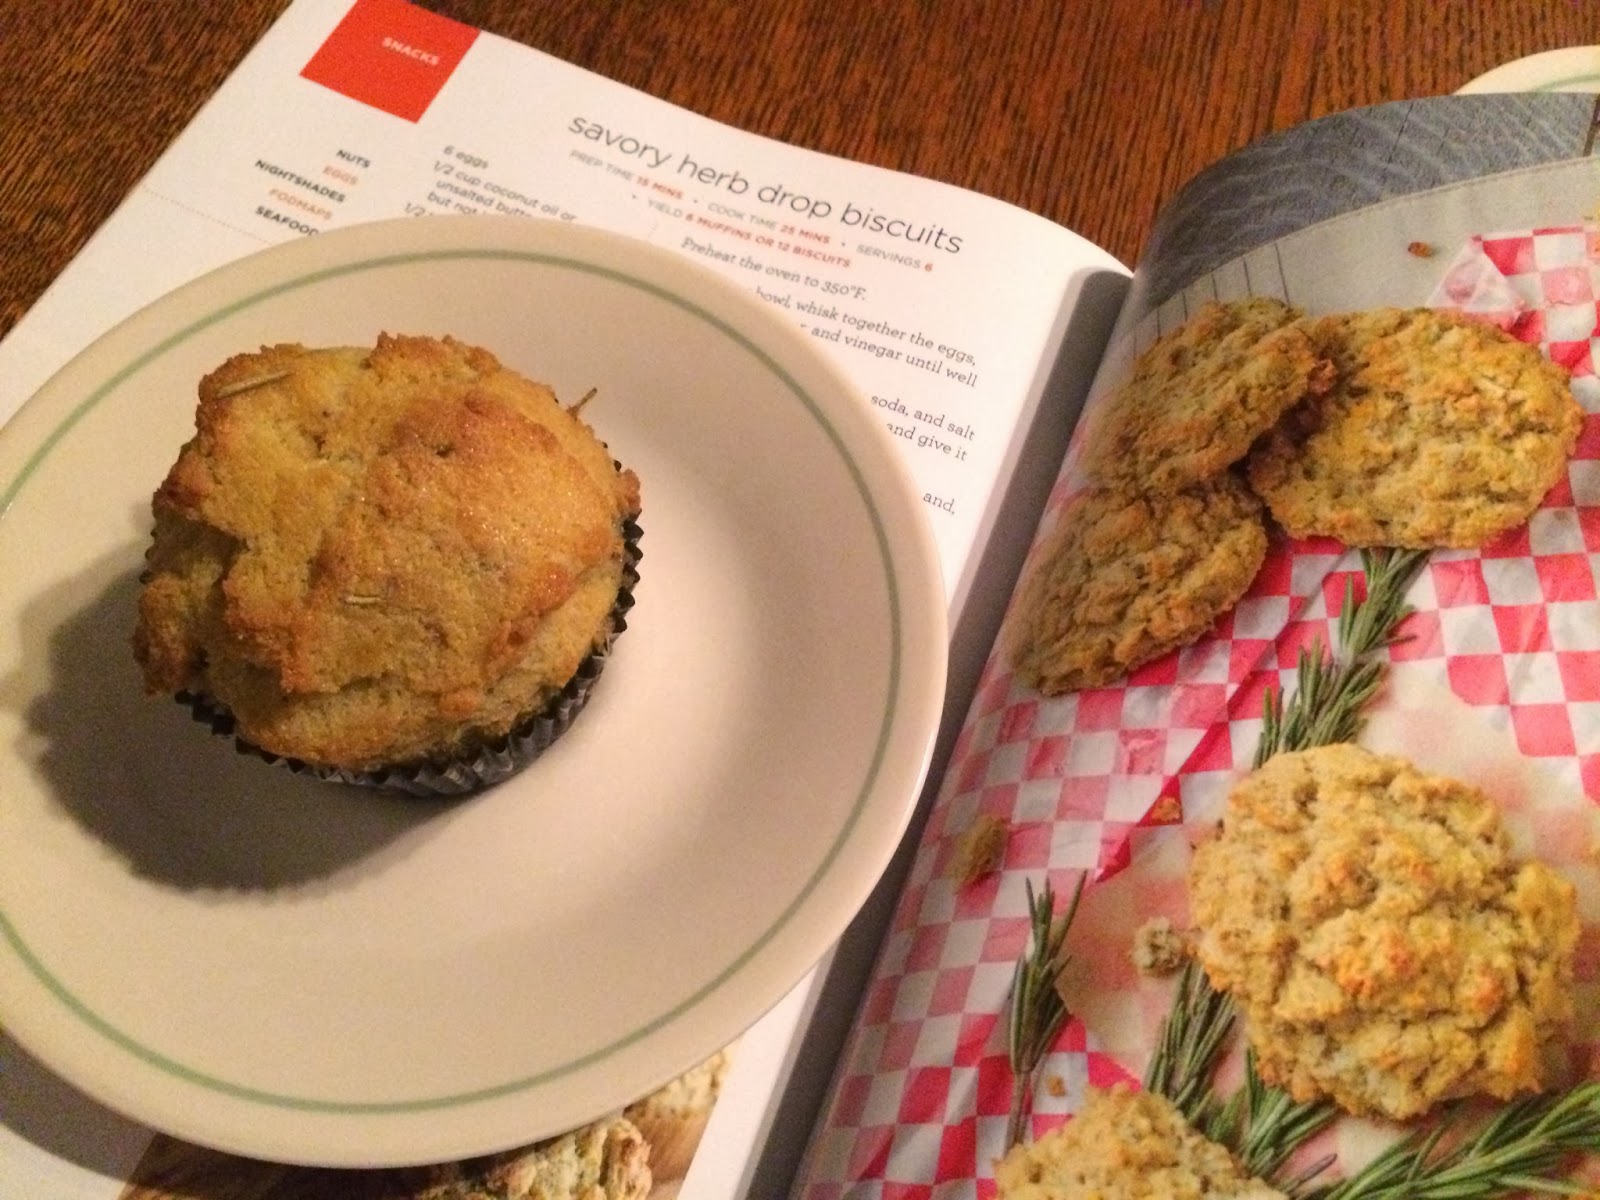
This is yet another beautifully crafted book by Diane Sanfilippo! She includes her quiz to determine the appropriate level to start the detox on and meal plans to suit each (along with the various modifications). This is followed by over 100 mouthwatering detox recipes. There's everything from Lemon Ginger Chicken to Pumpkin Spice Donuts to Sweetener Free Ketchup. after taking a look, I knew I just had to make a couple of the recipes from this fantastic cookbook! I made the Chicken Strips (pg. 78) and the No-Honey Mustard Sauce (pg. 202).


I did make one slight change to the chicken strips recipe by using chicken thighs instead of chicken breasts. (I can't help it! I'm a dark meat kinda girl...) The batter crisped up nicely in the oven and added a nice flavor to the meat. The  no-honey mustard turned out phenomenally! I could sit there eating it with a spoon. There's a little sweetness, without it being cloying, and the dijon gives it a tang. I've had such a craving for chicken fingers and a really good dipping sauce and haven't been able to have any since going Paleo. These two recipes are the perfect fix for that!

All in all, the 21 Day Sugar Detox Cookbook is a must for anyone wanting to try out some new recipes that ditch the sugar! It would also make a great Christmas gift!


Tuesday, November 5, 2013

CSA &Primal Cravings

So a little while back, my Mom and I signed up for a fall CSA share with the Good Food Collective. I couldn't be happier with the produce that I've received on a weekly basis thus far: tons of fresh lettuce, leafy greens, potatoes (yes, white potatoes... It seems as though the bigger names in the Paleo community have come to the conclusion that these are ok to eat, so long as you can tolerate nightshades...),  peppers, lots of apples, and eggplant. It's been ages since I've had eggplant! I gave them up when I was trying out the autoimmune protocol last February and haven't tried reintroducing them since. I hoped that this would be the perfect opportunity to do just that.

There was one problem. What the heck do I make with my new stash of eggplant? All I kept thinking about was how long it'd been since I'd had some lasagna or Italian sauce/pasta dish. It was always one of those things my Mom made for special occasions or on a holiday. Christmas dinner usually comprised of a big casserole dish of it. Cheesy. Saucy. YUMMY! Then it hit me. I'll make some sort of lasagna dish with the eggplant as the noodles. I give you:


Primal Eggplant Lasagna

(Looks messy, I know... Tastes divine!)

Ingredients:
  • coconut oil, melted
  • 6-7 small eggplant (or two large ones)
  • 1 jar tomato sauce (I used Wegman's Diavolo Sauce)
  • 1 lb ground beef (preferably grass fed)
  • 1 small onion, diced
  • 3-4 cloves garlic, minced
  • 1 small container ricotta cheese (I used an organic sheep's milk ricotta)
  • salt, to taste
  • pepper, to taste
  • dried herbs (like basil, oregano, thyme, etc...)
  • red chili flakes (optional)
Method:
  • Preheat the broiler of your oven and move the top rack to about 6 inches from the heating element.
  • Slice the eggplants into 1/4-1/2 inch slices. (If the skin is tough, feel free to peel it before slicing.) Toss with melted coconut oil and season with salt and pepper. Lay the slices in a single layer on a tinfoil lined baking sheet. Broil for a few minutes per side, basically until they turn golden brown.
  • Turn down the heat of the oven to 375 degrees.
  • Heat a pan over medium high heat. Add a little coconut oil, followed by the ground beef. Saute until starting to brown. Add the onions and garlic. Cook until the meat is browned and the onions are translucent. Season with salt, pepper, and chili flakes (if using).
  • Pour some of the tomato sauce into a 13x9" glass baking dish. Spread it around so it evenly covers the bottom. Place a single layer (about half) of the broiled eggplant in the dish. Put half of the browned meat over this. Sprinkle the ricotta cheese over that. Layer the remaining half of the ground meat mix over this. Lay the remaining half of the eggplant slices on. Top this with some more tomato sauce. Season with any desired herbs, pepper/salt, or red chili flakes. Place the dish in the oven and cook until everything is heated through and the sauce is bubbling, about 15-20 minutes.
  • Let the lasagna rest for about 5 minutes. You'll need to resist the urge to dig right in and scald your mouth.
I must admit that this is one of the tastiest dishes I've ever made! It totally reminds me of the lasagna my Mom made! The eggplant provides a nice substitute for the pasta that's flavorful and somewhat meaty. The sheep's milk ricotta is creamy and mild. If you can tolerate dairy, tomatoes, and eggplant, or just want to change up your lasagna routine, then this recipe is just for you!

Saturday, October 26, 2013

Rochester Paleo/Primal Meetup Group

Recently, I was talking to Justin about how I had the urge to go out and be social. I then came to the realization that I don't necessarily have that many friends around town that I can call up out of the blue and say, "Hey, let's do something tonight!" (I guess I never really thought of how much of a homebody/ introvert I am...) Not to mention that going out with my family and friends means either picking a restaurant that has Paleo options or having to bring my own meals and getting that upturned eyebrows, "You're weird for bringing food to a restaurant," look. I can't count how many times I've had to explain to people what my diet consists of and why I eat it...

Anyways, I mentioned all this to Justin and blurted out that I wished there was a Paleo Meetup Group or something of the sorts here in Rochester. To which he replied, "You wanna know how there can be one?" I then sarcastically said, "That I make one...?" and he answered, "Yes."

I thought about this for a minute or so and decided that was exactly what I was going to do. Therefore, I am pleased to announce the formation of the Rochester Paleo/Primal Meetup Group!


We're going to have our first meetup on November 3rd, at 1 pm at Roam Cafe (on Park Ave). Everyone is welcome to attend! I have the RSVP link below.

RSVP

Tuesday, October 22, 2013

21 Day Sugar Detox Book Review

My Sugar-filled Background:

It started back in December 2012, when I realized that while I was following a mostly Paleo diet, I was eating way too many sweets and treats. That whole month was basically one long sugar binge. I went from feeling good to just fair to not so hot.

I'd seen information about the 21 Day Sugar Detox program, created by Diane Sanfilippo, and heard that people had some good results doing it. After thinking about it for a while, I decided that this was just the thing I needed to get myself back on track. I dove in head first and did Level 3 of the detox. (At the time, I felt that it was better to go all in and not give myself the opportunity to cheat.) I'll admit it... It was difficult at first. I still craved some oh so delicious ice cream and post work day glass of wine. However, I made it through and realized that I felt AMAZING afterwards!

Following this first detox, a few months went by before I proceeded to do 2 more officially and one more unofficially. I've raved to my family, friends, and co-workers, about how this program WORKS. I even volunteered to be a "test" moderator to the forum on Facebook and helped to answer questions from other detoxers.

Well... I received my official copy of the 21 Day Sugar Detox book to review, and here's what I think:

21 Day Sugar Detox Review:


First off, I have to say that the cover is so bright and colorful, it just begs to be opened.

Diane adeptly discusses what sugar does to the body and how we come to crave it. I'm no science major, by any means, yet I was fully able to understand the science-y aspects of the breakdown of carbs into glucose, the formation of insulin, and the effects on cortisol.

I'm pleased to see that there's a prep checklist and a "What to Expect," section. I know that both of these would have been extremely useful to me during my first round of the detox. After having gone through a few rounds, I completely agree with what's said.

I love that Diane included a way to figure out which of the three levels is right for the participant and how to go about implementing it with a corresponding meal plan. This format reminds me of her other book, Practical Paleo, and she even includes some of that book's recipes.

I tried out two of the provided recipes: the Stovetop Lamb & Chorizo Chili (pg. 136) and the Savory Herb Drop Biscuits (pg. 188). The chili is an amazingly flavorful and warming dish that's perfect for a chilly fall day. The biscuits have a nice crumbly texture and don't taste too much like coconut, providing a wonderful accompaniment to the chili. (I'm not going to share these recipes. You'll just have to buy the book!)


All in all, I'd say that 21 Day Sugar Detox is a must read for anyone desiring to make a change and ditch the sugar monkey on their back!

Thursday, September 26, 2013

Plum Good!

I'm steadily making more progress with my recovery. I've finally reached a point where I can start going to physical therapy every other week instead of every week. I was able to sustain about 6 mph on the elliptical machine and 11 mph on the stationary bike. If things keep going this way, I can start running in a couple weeks. My orthopedic gave me the ok to start at 3 months post op, which is later this week and about a month sooner than someone with my surgery normally has to wait. I'm so excited!! This means that I can start swimming and get back to lifting heavy things soon!

Well, I've been making my usual Saturday trip to the Public Market and noticed that several vendors had fresh plums. I couldn't pass up on the opportunity to eat some of this harvest seasons eats! The only problem is deciding do with with a large basketful of plums. Don't get me wrong, I love eating them fresh and know that they'd taste really good in a plum pie or some plum pudding. I finally figured that I wanted to try something a little more savory with them. I give you:

Plum Chutney

(I swear this tastes and looks better than the picture! I really need to get a better camera...)

Ingredients:
  • coconut oil
  • 12-15 ripe plums
  • 1/2 medium onion, chopped finely
  • 3 cloves garlic, minced
  • 1 tbsp freshly grated ginger
  • 1-2 tbsp honey (preferably raw/local), use less if you want it less sweet
  • a splash apple cider vinegar
  • salt, to taste
  • black pepper, to taste
  • 1/4-1/2 cup water
Method:
  • Cut the plums in half and remove the pits. Cut the halves into small chunks. Set aside.
  • Heat a small saucepan over medium high heat. Add some coconut oil and let it melt.
  • Add the onion and let them cook until softened. 
  • Add the garlic and ginger. Let cook for another minute.
  • Add the plums, apple cider vinegar, honey, salt, pepper, and water. Let this come to a boil, reduce the heat, cover and let cook for a 5-8 minutes (you want the plums to soften). Remove the cover and let everything continue to simmer for 20-25 minutes or until thickened. (I added a half cup of water. My final chutney ended up a bit more watery than a typical chutney and more like a sauce. It's up to you how thick you'd like it to be.)
  • Taste, add any salt/pepper.
  • Serve over your desired protein (like pork or chicken). Enjoy!
I served this chutney/sauce over some curry roasted chicken, and it was fantastic! It's not overly sweet and is evened out some with the cider vinegar. I can only imagine that this would taste equally good over some pork or some roasted turkey or even, dare I say, ice cream... Mmm...

Friday, September 20, 2013

Fall is Here!

Fall is here, and that means that the chilly weather is coming to good ol' Rochester, NY. We awoke to a 30-something degree, frosty morning, a couple of days ago. I'm happy that I was able to bust out one of my pairs of boots and my new fall trench coat; however, I'm always a little sad on the day of the first frost. It foretells of the upcoming winter and snow... I'll admit it. I'm a bit of a cold wimp. I love the changing of the leaves, everything pumpkin, warm apple cider, and Halloween (my FAVE holiday). Yet, I don't like having to bundle up.

Since I've brought up the idea of pumpkin, I thought it'd be a good time to develop a deliciously warming fall soup:

Chai Pumpkin Soup


Ingredients:
  • lard, melted
  • 1 small pumpkin (or squash, like acorn), cut in half and seeds scooped out
  • 1 head garlic
  • 4 strips bacon (sugar free/nitrate free from pastured pork if you can get it)
  • 1 large onion, chopped
  • 2 cups broth + a little more (if necessary)
  • 1 cup full fat coconut milk
  • a few cups broccoli, cut into florets (I used one very large head of broccoli)
  • half a small cauliflower, cut into florets
  • 2 1/2- 3 cups leftover chai chuck roast (recipe to follow)
  • 2-3 tsp cinnamon
  • 1/2 tsp cayenne pepper (optional)
  • salt, to taste
  • pepper, to taste
  • freshly chopped cilantro, for garnish (optional)
Method:
  • Heat your oven to 400 degrees. Rub the cut side of the pumpkin with some of the melted lard, sprinkle with a little salt and pepper. Place meaty side down on a baking sheet.
  • Cut the top 1/4 inch or so of the garlic bulb off, exposing the individual cloves. Place the bulb onto a small sheet of aluminum foil. Pour a little melted lard over the exposed bulbs. Enclose the bulb with the foil and place it on the baking sheet with the pumpkin.
  • Roast the garlic and pumpkin for 30-40 minutes, depending on the size of the pumpkin. You should be able to easily pierce through the skin of the pumpkin with a fork.
  • Unwrap the garlic bulb and let it cool. Then squeeze out the cloves and set aside.
  • Let the pumpkin cool. Then, scoop out the flesh and set it aside.
  • Meanwhile, heat a large dutch oven or soup pot over medium-high heat. Put the bacon strips into the pot and let them cook until crisp. Set them aside on a paper towel lined plate. Keep the bacon fat in the pot.
  • Add the onion to the pot and sauté until softened. Add the cooled pumpkin, all of the roasted garlic cloves, coconut milk, and 2 cups broth. Bring to a simmer.
  • Remove the pot from the heat. Using an immersion blender, puree the soup until smooth. You could also pour the soup into a blender or food processor and puree the soup, in batches, and return it to the pot. Return the pot to the heat.
  • Add the leftover chai roast, cinnamon, cayenne, salt, pepper, broccoli, and cauliflower. Bring the soup to a simmer and let it cook until the veggies are tender. Crumble the bacon into the soup. Taste, adjust seasonings (if necessary), top with cilantro.
  • Enjoy!


Chai Chuck Roast


Ingredients:
  • 1 chuck roast (preferably from grass fed)
  • 3 tbsp chai tea (I used a loose chai blend from Wegmans)
  • 2 tsp garlic powder
  • 2 tsp onion powder
  • 2-3 tsp salt (depending on how salty you want it)
  • 2 tsp black pepper
  • 1 cup broth (I used homemade beef bone broth)
Method:
  • Blend all the seasonings in a small bowl and rub it all over the roast.
  • Put the roast in a crock pot. Pour in the broth over the roast.
  • Let cook on low for 8-10 hours.
  • Pull out the roast, shred the meat, and return it to the juices/broth.
  • Serve with your favorite side!
The initial idea for the chai roast was inspired by my rooibos roast. The flavor of the tea is warming and beautifully compliments the beef. Pair it with some sautéed greens (like I have pictured above) or some roasted veggies and you've got yourself a nice meal.

The soup may seem like it has a fair amount of time and work, but it's totally worth it! Pre-roasting the pumpkin and garlic add some depth. The chai and cinnamon bring out those fall flavors that I absolutely love!

Sunday, September 8, 2013

End of Summer Grilling

I am pleased to say that I'm doing very well with my post-surgery recovery. I was able to ride a stationary bike last week and have managed to go on increasingly longer walks around the neighborhood. It feels really good to be up and moving about without feeling as though I'm dragging some dead weight around. I will admit that my leg starts to bother me if I'm on my feet for too long, but with a little bit of stretching it fades away.

As a result of my being able to walk around more, I can traverse my public market much more easily. I do so enjoy my weekly visit to pick up my meat order. Mmm... meat... Anyhoo, I was introduced to a wonderful cut of meat a while ago that I've finally decided to share with the rest you: the pork steak. It's as though a pork chop and a beef steak got together and had a love child. Let me just say, it's fantastic!

Grilled Seasoned Pork Steak


Ingredients:
  • 2 pork steaks
  • salt, to taste
  • pepper, to taste
  • seasonings (I used some Berbere spice blend)
  • olive oil
Method:
  • Take the pork steaks out about a half an hour before you plan on grilling them. This will bring them to room temperature and allow for a more even cook time.
  • Preheat your grill to high heat.
  • I pour a little bit of olive oil over both side of the steaks.
  • Season the steaks on both sides with salt, pepper, and chosen spices/seasonings.
  • Once the grill is hot, throw on your steaks. Allow them to cook for 5 minutes on the first side. Flip them over and grill for another 4-6 minutes, depending on what doneness you like (Justin and I prefer medium rare).
  • Remove the steaks and allow them to rest for 5-10 minutes.
  • Serve with your fave side.
I insist that you try pork steaks! They're slightly fattier than a chop and are incredibly tender. Feel free to use whatever spices you have on hand. I've gone really basic and just done salt/pepper to doing rosemary and a drizzle of balsamic. Pork really lends itself well to a myriad of seasoning blends. Add an awesome side to the mix (I made the delicious "Fauxtato Salad" from Beyond Bacon), and you've got yourself a great meal!

If anyone has any issues with cooking pork to medium rare, let me refer you to a recent New York Times article stating that the USDA has decreased the safe cooking temperature of pork from 160 degrees to 145 degrees. The chances of you getting some food born illness are pretty slim, especially if you can get your hands on some quality pastured pig products. Let me also add that Justin and I have yet to get sick from pink pork steaks.

Monday, September 2, 2013

In a Pickle

Ever since I was really young, I've loved sour or tart tasting things. My Mom used to get me a lemon when we would go to the grocery store. She'd prick it open, give it to me, and I'd suck the juices out while she pushed me in the cart. She tells me that the other shoppers would look at her like she was crazy or somehow forcing me to do this. To this day, I still love to cut a lemon in half and eat it like an orange.

I have developed a penchant for other sour foods as well. Take kombucha, for instance. I'll let me batches ferment to the point where pretty much all of the sugar is used up and the beverage becomes fairly vinegary in taste. Ever since I've started making kumbucha and sauerkraut, I've wanted to further delve into the realm of fermented goodness. I took a little inspiration from what the public market had to offer and found the next item to add to my ferment list:

Fermented Dill Pickles


Ingredients:
  • small cucumbers, cut off the ends and cut each in half
  • 3-4 cloves garlic, smashed
  • sprigs of dill
  • 1 1/2 cups filtered water
  • 2 tbsp sea salt
  • peppercorns
  • red chili flakes, optional
  • 1 small onion, quartered
Method:
  • Place 1-2 garlic cloves, some peppercorns, red chili flakes, and a few sprigs, of dill, into a glass pint jar.
  • Stuff the cucumbers into the jar until they are packed in.
  • Combine the salt and water in a glass and stir until the salt is dissolved.
  • Pour the salt water into the jar until it covers the cucumbers.
  • Top the jar with another sprig or two of dill. Top these with two quarters of onion so that they are holding the cucumbers under the liquid.
  • Put the top on the jar and screw it on. You don't want to screw it on too tightly, a little bit of air needs to get in.
  • Set the jar in a cool, dry place and let the cucumbers ferment for 3-7 days, until they reach your desired level of sourness. Know that the longer you let them ferment, they'll get more sour, but they'll also get softer.
These not quite as sour as ones you might pick up at the store, as there's no vinegar in the mix. Nonetheless, they're tasty! Justin, who doesn't quite share my enthusiasm for sour things, said the fermented cukes were very good. You can feel free to add other spices or herbs to the mix to create other flavors of pickles.

I never thought it would be so easy to make pickles or any other fermented thing. It's really quite simple! You get all the benefits of the good bacteria in the fermenting process and some tasty vittles. If anyone wants to know more about this, you should check out Fermented, by Jill Ciciarelli. I've got this book on my wish list and am anxious to buy it/check out the recipes.

Monday, August 26, 2013

Nutrient Density

Lately, I've been thinking a lot about my diet. Not so much in the sense of a weight loss program, but in my general eating habits and what Paleo means to me. One of the many podcasts I've been listening to, The Paleo View by Sarah Ballantyne and Stacy Toth,  recently had a three part series outlining their take on the Paleo diet/philosophy. I won't go into too much detail about what they said as I think people should check out the series out for themselves. (Seriously folks, this podcast is great! Sarah and Stacy are informative and such a delight to listen to. They're one of my inspirations for starting this blog.) I came to realize that I completely agree with these two ladies and have decided that this is my foodlosophy:

I am grain free/gluten free/legume free. I eat meat, fats, vegetables, fruits, and occasionally some dairy. I try to focus on making these foods be of the highest quality, preferably locally raised, and as nutrient dense as possible. Ever since I started eating this way over a year ago, I have stopped having any 'attacks' from the IBS that I was supposedly diagnosed with. My skin looks better, I have more energy than I ever, I sleep like a baby, and I have a much better time dealing with my food issues. (Yes, I have food issues. One of the reasons why I started seeing a therapist.) Do I occasionally eat potatoes, corn tortilla chips, or Paleo "treats'? Yes, and I love the fact that I'm free to do so.

In keeping with this newfound food outlook, I've come up with a really nice, nutrient dense meal.

Nutrient Dense Italian Wedding Soup


Ingredients:
  • Meatballs:
    • 1 lb ground beef (preferably grass fed)
    • 1 lb chicken livers (preferably from pastured chickens)
    • 1 egg (preferably from a pastured chicken)
    • 2-3 tbsp coconut flour
    • 1 tbsp oregano
    • 2 tsp garlic powder
    • 1 1/2 tsp onion powder
    • 1-2 tsp salt
    • 1-2 tsp black pepper
    • a couple dashes red chili flakes
  • Soup:
    • lard (you could also use coconut oil, butter or ghee)
    • 6-8 cups bone broth
    • 1 large onion, chopped
    • 4-6 cloves garlic, minced
    • 1 16 oz bag frozen spinach, thawed
    • ~1/2 lb okra, sliced
    • 1 pkg kelp noodles, rinsed
    • ~2 tsp dried thyme
    • salt, to taste
    • pepper, to taste
    • red chili flakes, optional
    • chopped fresh parsley, for serving
Method:
  • Place the chicken livers in the bowl of a food processor and pulse a few times to blend them up. Add all of the other meatball ingredients and pulse until everything is mixed together. This will somewhat resemble thick pink sludge and that's ok. If the mix is too liquid-y, add a little more coconut flour. You can set the meatball blend aside while you start the soup.
  • Heat a large soup pot or dutch oven over medium high heat. Put some lard (or other fat) into the pot.
  • Add the onions and saute until softened. Add the garlic and cook for another minute. Add the sliced okra and let that cook for a couple of minutes. Pour in the broth, salt, pepper, thyme, red chili flakes (if using), and let the liquid come to a boil.
  • Once boiling, you can add your meatballs. I used one tablespoon to scoop out the meatball mix and another spoon to slide the mix into the soup. They won't be perfectly round, but they do stay in ball shapes. Keep spooning the meat into the soup until it's gone.
  • Add the kelp noodles and spinach. Return the soup to a boil, reduce the heat. Simmer for 20-25, or until the kelp noodles are tender and the meatballs are cooked through. Taste, adjust seasonings.
  • Serve in large bowls, topped with fresh parsley.
  • Enjoy!
Justin isn't necessarily the biggest fan of liver. However, when he started eating this soup, he said, "Wow... This is really good!" I actually had to tell him that there was chicken liver in it. That being said, this soup tastes absolutely a-mazing! The broth is rich and flavorful. The meatballs are moist and don't have a hint of any unctuousness. Plus, this soup has all the makings of one nutrient powerhouse of meal! If you want something that warming on a cold day and full of all the good stuff, give this recipe a try.

Sunday, August 18, 2013

Green Eggs and Ham!

I know it's been a while since I've blogged. Sorry folks! I've been trying to get back into the swing of things  with work and adding in my physical therapy. I'm happy to announce that I've made great strides in regards to my recovery. I'm officially out of my torture device of a brace and am almost completely walking sans crutches. There are times when my progress seems really slow, but then I remember to tell myself that it's still progress.

On another note, I've just finished up a round of the Whole 30 challenge. It basically means that you go 30 days grain, dairy, legume, and sugar free, for 30 days. Some fresh fruit and even a little dried fruit is allowed. I know it seems like an extremely difficult thing to do, but I swear that it's easier than you think! I feel so much better when I'm not relying on sugar or processed foods to get through my day. If anyone is struggling with weight issues or wants to jump start their health, give the Whole 30 Challenge a try!

This week, I'm taking a little trip down memory lane and paying homage to Dr. Seuss. I've made a grown-up version of 'Green Eggs & Ham.'

Green Eggs & Ham


Ingredients:
  • lard (you could also use coconut oil, butter, or ghee)
  • a dozen eggs
  • 1 16 oz bag frozen spinach, thawed
  • 4 oz diced prosciutto
  • 6 sprigs fresh thyme 
  • 1 1/2 tsp garlic powder
  • 1 1/2 tsp onion powder
  • 1/4-1/2 tsp paprika
  • 1/4 tsp ground savory
  • salt, to taste
  • pepper, to taste
  • a couple dashes red chili flakes, optional
Method:
  • Preheat the oven to 375 degrees. Grease a 13x9" glass baking dish with lard (or other suggested cooking fat).
  • Crack all of the eggs into a large bowl and whisk until pale yellow. (You could use a regular whisk to do this or you can take the lazy version, like me, and use a fork...) Strip the thyme sprigs of their leaves and throw them into the eggs. Add in the spinach, prosciutto, and seasonings.
  • Pour the egg mixture into the prepared dish and bake 40-45 minutes, or until the top and edges are golden brown and the center is set.
  • Enjoy!
First off, I'd like to say that the basis of this recipe comes from the 'Crustless Swirly Quiche' in Diane Sanfilipo's Practical Paleo. I encourage everyone to buy this book! It's a treasure trove of information on transitioning to/maintaining a Paleo style diet and has many fabulous recipes. 

For my variation, the salty prosciutto and the spinach blend together wonderfully to turn this into a masterpiece! The thyme and savory add a nice herbiness. Feel free to change up the seasonings as you see fit. I'm sure that this would be excellent with some cumin, ground chipotle, and chili powder... or maybe some smoked paprika and sage... or even add some shredded cheese, if you can handle dairy. Another suggestion is to do what I do and cut this up into small portions. You can then use the individual pieces as your on-the-go breakfasts. You don't necessarily have to reheat them to eat. I've eaten this cold and think it's still fantastic!


Saturday, July 27, 2013

Clarified Goodness!

I've officially decided that I have kitchen gadget lust. I keep finding various kitchen items that I want and don't have the space for. For instance, I had to have a new crock pot for my birthday, wanted a waffle iron and a spirulizer for Christmas. Currently, I'm drooling over a boning knife (for my quest to debone a chicken), a meat cleaver (for my eventual butchering...?), a meat grinder (so I can make my own ground meat combos and to break down leaf fat/suet to make lard/tallow), a soda stream (I've become obsessed with sparkling water lately) and a sous vide (which is very expensive at $450 and will probably never get). Granted, the one thing I really want is a giant chest freezer for my basement, so I can buy a 1/4 or 1/2 a cow. I also know some local farms that sell 1/2 or whole pastured pigs and lambs. It's a fair investment up front, but ends up being cheaper in the long run... Not to mention that you won't have to buy meat again for a long time.

Sorry to start off with a long tangent there, but it's been on my mind for a while. I've decided that this week I was going to try my hand at a recipe that I've been meaning to make for a while: ghee. Essentially, it's just clarified butter. It makes for a really nice cooking fat and has very few dairy proteins remaining after the clarifying process, which makes it more tolerable for those with casein or lactose sensitivities.
 Ghee

Ingredients:
  • butter, preferably from grass-fed dairy
Method:
  • Place the butter into a sauce pan or pot and let it melt over low heat. Let the melted butter simmer. Eventually, you'll see the milk fats float to the surface and start to foam.


  • Skim off the milk solids and let the oil continue to simmer until the remaining milk particles sink, turn golden brown, and there are few bubbles rising to the surface.


  • Remove the pot from heat and let it cool. Then, strain it through a cheesecloth or a small mesh sieve into a clean glass jar.


  • You can put your newly created ghee into the fridge. Use it as you would butter or oil.


This recipe was a cinch to make. This is namely because there's only one ingredient and you just have to keep an eye on the pot. FYI, eggs taste really awesome when they're fried in this stuff! Ghee would also taste good with any veggies you might saute, or even use it as a topping for some grilled goodies.

Friday, July 19, 2013

My Go-To Meal

I know that it's been I while since I've blogged, but I can assure you that it hasn't been far from my thoughts. A few updates since I last wrote: I've officially made it to my 28th birthday and have had my knee surgery. Per my orthopedic, I'm doing very well and can begin going PT in a little over a week. I am starting to bear some weight on my right leg, with a very sinister looking brace on. (I swear the thing looks more like a torture device than anything good...) The hope is that I'll be able to bear full weight in four weeks and then can focus on walking on my own. I have also been granted the permission to begin bending my knee to 40 degrees, albeit with some assistance from my left leg. My mobility is still somewhat challenged, and there are times when my sanity seems to be fraying (going from being active to a temporary shut-in is not exactly easy...) I'm trying my best to remain cheerful and cool. (So happy that we have central air with the temperatures reaching the mid-upper 90's. Yikes!) All that being said, I should probably get on with the good stuff.

Whilst on my pre-surgery vacation time, I was asked by my dear friend Elaine for some meal ideas that are easy, fairly quick and allow for the addition of various veggies that may tempt picky eaters. I started going over of all the dinners that Justin or I make over the course of the week, and after a while, noticed that there was a particular style of dish that kept reoccurring.  I've somewhat simplified it into the following:

Easy Go to Meal:

Ingredients:

  • Coconut oil/butter/lard (choose a fat that works for you)
  • Ground meat: beef, lamb, bison, chicken, turkey, pork, venison, kangaroo (I know this one sounds odd, but you can get it certain places), ground up organ meats, etc...
  • Onion, chopped
  • Garlic, minced
  • Veggies: use bags of frozen veggies (thawed of course) or fresh ones I generally have frozen broccoli, spinach, collard greens, or cauliflower on hand at all times. I also tend to have these same items fresh, when in season. Keep your options open with all types and colors, like: green/red/yellow/orange peppers, purple/green cabbage (shredded or chopped), green beans, mushrooms, beets, asparagus, fennel, leeks, kale, spinach, collard greens, tomatoes, orange/purple carrots, celery, etc...
  • Seasonings: Obviously there's salt and pepper, but you can use any kind you wish to get the flavor you want. IE - Italian: I tend to go a little more herby with oregano, basil, parsley, sage, rosemary, thyme, red chili flakes, or marjoram. Mexican: Cumin, chili powder, cayenne pepper, cocoa powder or raw cacao (good for a mole sauce), oregano, cinnamon, ground chipotle, coriander, thyme, paprika. Asian: ground ginger, ground cloves, red chili flakes. Indian: ground ginger, coriander, cumin, mustard seeds, fennel, garam masala, chili powder, turmeric, cloves, cardamom, fenugreek, asofetida, cinnamon, paprika (what spices don't they use?) Feel free to make up your own blends, complex or simple.
  • Sauces/liquids: broth, coconut milk, heavy cream, coconut aminos, fish sauce (slight warning: a little of this stuff goes a long way), vinegar or some sort (balsamic, rice wine, red wine, apple cider, etc), tomato sauce, lemon/lime juice, you could even use some beer or cider, etc...
  • Random other things, like: bacon, nut butter (almond, macadamia, pecan, etc), nuts, any garnishes (fresh cilantro, basil, parsley, lemon/lime juice, shredded coconut, etc), shredded coconut, etc...
Method:
  • Heat a pan over medium-high heat. Add a little bit of your cooking fat and then add your meat. Cook until browned. Remove the meat and save the drippings. (More often than not, I just leave the meat in there for the whole process. I'll cook the meat until it's mostly browned and then add the onions/peppers/mushrooms/celery/ carrots. I can be quite lazy...)
  • Add any extra fat if needed. Then, add your onions +  any mushrooms/carrots/celery/peppers, if you haven't already. (Basically, this is anything that will take the longest amount of time to cook/soften.) Cook until slightly softened. Add the garlic and cook for another minute.
  • Add any liquids/sauces/nut butters, your browned meat (if not already in the mix), and/or any veggies that may take a little longer. Let the liquids/sauces come to a simmer. Turn the heat down and let everything cook until the veggies are tender. If you were cooking spinach, you could add it here. Stir it in until it's wilted. 
  • Serve this meal by itself, over whatever you like (zucchini/carrot/sweet potato/cucumber noodles, roasted veggies, cauli-rice, rice, pasta, etc...), or with any side dish. Garnish with any items that may go with your meal.
Here are some examples of meals I've made in this style:
Curry in a Hurry
Sausage & Kale "Stew"
Jamaican Me Crazy Plate
Sausage Sauce & Squash
"Garbage/Clean out the Pantry" Curry
Mexi-Beef with Peas & Pepitas
Hidden Liver Bolognese

As I said before, Justin and I both make dinners using the above "formula" multiple times a week.  We just throw together whatever we have on hand and go with flavors that we seem to crave at that particular time. For the most part, we come up with something that tastes really good. Other times, it's just okay; however, we generally end up scarfing it down anyways because we're hungry... Feel free to get creative and experiment with different herbs, spices, and veggies. You may be surprised at what you can make.


Thursday, June 13, 2013

Progress and Yumminess!

I'm proud to say that I'm making some more progress with my knee. I can walk, rather slowly, sans crutches and immobilizing brace. I can bend it close to 90 degrees with very little pain. I can also lift my leg up onto one of the steps on my staircase; however, I'm not able to bear my full weight on that leg to actually take the step up. Considering the fact that I couldn't lift my leg last week, this is huge! I even had enough stamina to make it to the Public Market this past weekend.

Seeing as this was the first chance I had to walk around the Market (and not have to rely on Justin), I made it a point to stock up on meats from my fave farmers, Seven Bridges. I managed to come away with a treasure trove of goodies for my culinary adventures this week. One of these goodies is a bit of meat that many Americans may not venture to try to make. (No, it's NOT organ meat... While I love the stuff, I'm going to spare you guys this week.) I give you:

Pressure Cooker Braised Oxtails


Ingredients:
  • grass fed butter or coconut oil
  • 2 oxtails, trimmed and cut into 2" pieces
  • 1 large onion, chopped
  • 5-6 carrots, cut into large chunks
  • 4 large cloves garlic, minced
  • 12 oz collard greens, stemmed and roughly chopped
  • 1 14.5 oz can tomatoes
  • 1- 1 1/2 cups broth (all I had was veggie stock, but bone broth would do too)
  • 1 bay leaf
  • 1 1/2 tsp dried thyme
  • 1 1/2 tsp rubbed sage
  • 1-2 tbsp balsamic vinegar (I'm guessing on this... I just wanted to add some acid to brighten the dish.)
  • red chili flakes, to taste
  • salt/pepper, to taste
Method:
  • Heat a pressure cooker over medium high heat. Add some butter or coconut oil. Add the oxtails and cook until browned. You may need to do this in two batches. Remove the meat and set it aside.
  • Add a little more butter or coconut oil, if need. Toss in the carrots and cook for a few minutes. Add in the onions and cook until softened. Add garlic, cook for another minute or so.
  • Add the collard greens and stir them into the mix until wilted.
  • Return oxtail pieces to pressure cooker. Add bay leaf, thyme, sage, broth, tomatoes, salt, pepper, chili flakes and balsamic vinegar. Put the lid on and bring it to high pressure. Reduce the temperature enough to maintain high pressure and cook for 40-45 minutes. Use the quick release method to release the pressure.
  • Open the lid, remove the bay leaf, taste and adjust seasonings.
  • Serve over roasted spaghetti, zucchini noodles, kelp noodles or pasta.
Can I just say how much I love oxtails?! They're such an underrated cut of meat! This recipe highlights just how yummy they are. The oxtails little fatty and a little cumbersome to eat. But... I think it's fun to suck the meat off the bones. (I just treat them like the beefy version of chicken wings. You could also cut the meat off of the bones. The pressure cooker makes it so that it's tender and pretty much falls off by itself.) The carrots are sweet and delicious. The collards are slightly bitter and the balsamic creates a wonderful brightness. I served this all over some roasted spaghetti squash. All in all, fantastic!

For those of you scared to try oxtails, don't be! They're great and their cheap! If you want to try this and don't have a pressure cooker, you could brown the meat and the add everything to a slow cooker. Set it on low and cook for 8-10 hours.

Tuesday, June 4, 2013

Homemade Barbecue

I was all bummed out last week as I found out that I'm going to need surgery to repair the partially torn ligament on the side of my knee and to reconstruct the cartilage under the kneecap. I also found out that in order to have said surgery, I need to do physical therapy to the point where I can ride a stationary bike. While I am happy that I have and answer to my knee issue and know that there's a solution, the whole having to wait and go through some rather unpleasant pre-surgery rehab is not exactly my idea of fun.

In addition to this news, my laptop randomly died on me. I tried ordering a new hard drive and replacing the one I had. That didn't work. I brought it to the Apple store and discovered that the cable connecting the hard drive to the logic board needed to be replaced. It was and order was once again restored to the universe. (I've realized just how attached I've become to my laptop when I have to spend a week without it...)

These two incidents, coupled with the lack of my usual physical activity and less than stellar sleep, have made me start to stress eat, crave sugary foods, and consume slightly more alcohol than I'd normally go for. Not cool. I decided that I was going to start another round of the 21 Day Sugar Detox, starting June 3rd, to bash my recent sugar sweet binge and get back on track.

I started thinking about my detox over the weekend when I was craving some barbecue. Justin and I picked up some ribs from Wegmans and went to check out the pre-made sauces. After reading the label on every different brand, I realized that they all contained some sort of sugar and that the only way I'd be able to get a good sauce was to make it myself. I then started searching high and low on the interwebs for a sugar free sauce and couldn't really find one. I did, however, find a tasty sounding one that only contained pineapple and decided that I could probably adapt it to be detox compliant.

21 Day Sugar Detox BBQ Ribs


Ingredients:
  • 3-4 pounds pork ribs


Dry Rub:
  • 1 tbsp each of salt
  • 1 tbsp pepper
  • 1 tbsp smoked paprika
  • 1 tbsp garlic powder
  • 1 tbsp onion powder
  • 1 tbsp cumin
  • 2 tsp each of cayenne
  • 2 tsp oregano
  • 1 tsp coriander
  • 1 tsp cinnamon
  • 1/4 tsp ground cloves
BBQ Sauce:
  • 1 can diced tomatoes
  • 1 white onion, chopped
  • 4-5 cloves of garlic, minced
  • 1 6 ounce can of tomato paste
  • 1 cup bone broth
  • 2 tbsp sugar free, spicy brown mustard
  • 2 tbsp apple cider vinegar
  • 1 tbsp extra virgin olive oil
  • 2 tbsp paprika
  • 1 tsp sea salt
  • 1 tsp cayenne
  • 2 Granny Smith apples, peeled and chopped (I know you're only supposed to eat 1 per day, but you don't use that much sauce on these ribs... Just a little slather towards the end. Plus, this is for multiple people/servings.)
Method:
  • Combine all of the dry rub ingredients in a small bowl. Wipe off the ribs and massage the spice mix onto them. Place the seasoned ribs onto the tin foil. Tear off another sheet of tin foil and lay this over the top of the ribs. Tightly crimp the edges of the two sheets of foil together to create a seal. Stick the baking sheet in the fridge to let the ribs marinate for a half an hour or more (you could probably let them sit overnight).
  • When you're ready to cook the ribs, preheat the oven to 250 degrees. Throw in the meat and let it cook for 2 1/2 - 3 hours, turning occasionally. The meat should be shrinking away from the bones.
  • In the meantime, you can make the sauce. Combine all of the sauce ingredients in a sauce pot or dutch oven, over medium heat. Bring this up to a boil, reduce the heat, cover, and simmer for an hour. Take the pot off the heat. Using an immersion blender, blend until smooth. (Alternately, you could puree this in batches in a regular blender.) Keep the sauce warm until you're ready to use it or store in a container for later use.
  • Once the ribs are done, take them out of the oven. Set your oven to broil and move the rack to 4-6 inches from the heating element. Let the ribs rest for 10 minutes. Open up the foil and slather on a little of the barbecue sauce onto the ribs. Place them back in the oven and broil for 2 minutes. Flip the ribs over, brush them with a little more sauce and broil for another 2 minutes. Take the ribs out and serve with your favorite side.
  • Enjoy!
(Mmmm... Barbecue sauce...)

I used the recipe from the Paleo Cupboard as the basis for the dry rub and cooking technique for the ribs (I haven't spent a ton of time on her site, but from what I've seen, she's totally legit). The sauce recipe was modified slightly from the Civilized Caveman (I LOVE his website!! The man is a genius when it comes to creating delicious recipes. Seriously... check him out!)

This recipe turned out absolutely FANTASTIC!! The meat was so tender, it just fell off the bones! They had just the right amount of heat from the cayenne and just a hint of sweetness from the apples. I honestly used to be scared of trying to cook ribs in the oven and left it up to places like Dinosaur BBQ. Not anymore! These are going to become a new staple in my house.

Try these out and you'll be completely satisfied!

Monday, May 20, 2013

It pays to get to know your farmer!

A couple of weekends ago I was at my public market and visited one of my local vendors. I typically refer to him as 'The yogurt guy,' as he's the one that I get my wonderful, grass fed, cream-top yogurt (it's the Ithaca Dairy Company yogurt). We got to talking and happened to start discussing offal. That's right... organ meats.  I mentioned that more people should try organ meats and that they taste great, when cooked right. He said that one of his personal favorites was lamb liver. I told him that I'd never tried it before and wasn't sure where I could obtain it. He said that he could bring some for me the next weekend and that it'd be no trouble.

With all of that being said, my recipe for this week involves lamb liver. It doesn't quite have that in your face, "I'm liver!" flavor that beef has. So don't be put off just yet. Take a chance and try it!

Hidden Liver Bolognese


Ingredients:
  • 1 lb lamb livers
  • 1 lb ground beef
  • 10 oz baby spinach
  • 16 oz sliced mushrooms 
  • 1 onion, chopped
  • 4-6 cloves garlic, minced
  • 1 28 oz can tomato puree
  • 1 14 oz can diced tomatoes
  • 1 tbsp dried basil
  • 1 tbsp dried oregano
  • 2 tap dried thyme
  • red pepper flakes, to taste
  • salt/pepper, to taste
  • splash of balsamic vinegar
  • 1 spaghetti squash, cut in half and seeds removed
  • olive oil
Method:
  • Preheat the oven to 400 degrees. Rub the meaty sides of the spaghetti squash with a little olive oil and sprinkle with salt/pepper. Place them oiled side down on a baking sheet. Roast for 35-40 minutes, or until the squash is easily pierced with a fork.
  • Meanwhile, heat a large put or dutch oven over medium high heat.
  • Puree/grind up the lamb livers in a food processor or meat grinder. Set aside.
  • Add the ground beef to the pot and and cook until browned. Remove and set aside (leave the rendered beef fat).
  • Add the onions and mushrooms to the pot. Cook until the onions have softened and the mushrooms have released their water. Add the garlic, and cook for another minute.
  • Add the ground up liver and cook for another couple of minutes. Add the cooked ground beef, basil, oregano, thyme, both cans of tomatoes, salt/pepper, red pepper flakes and the splash of vinegar. Bring to a simmer and let cook for 10-15 minutes, to let the flavors meld.
  • Add the spinach and stir until wilted. Taste, adjust seasonings.
  • By this time your squash should be done. Take it out of the oven and let it cool slightly. Flip the squash over so that it's meat side up. Use a fork to shred the "meat" and form it's signature spaghetti-like strands.
  • Put some of the spaghetti squash in a bowl and ladle on some of the sauce.
  • Enjoy!
This recipe may sound intimidating, time-wise and ingredient-wise. I can assure you that it's totally worth it! There's only a slight liver flavor. The ground beef, tomatoes and herbs, help to cover it up.  This turns out to be a hearty meat sauce that pairs perfectly with the sweet, roasty spaghetti squash. Give this recipe a try, it's super tasty!

Monday, May 13, 2013

Not to be discouraged...

So this past weekend was a little bit traumatizing... I went for a run on Friday afternoon. Everything was fine. There was a little rain, but I managed to get Justin to run with me. I was excited because we were going out to dinner at a new restaurant, opened by a friend of ours. It started raining harder on the way there. No big deal. We get out of the car and walk into the place. Just after I walk in the door, I slip and go down hard. My leg went one way and my kneecap went the other. It slid back into place, but still... OWW! Needless to say, I'm officially out of the Buffalo Marathon. Major disappointment!

Despite my somewhat horrific weekend, I won't let my injury keep me from cooking! I still managed to come up with some pretty decent grub:

Mexican Side Pork with Biscuits & Green Beans


Ingredients:
  • green beans
  • 1 onion, chopped
  • 3-4 cloves garlic, minced
  • lemon
  • salt/pepper, to taste
  • coconut oil
  • spritz of water (to steam the beans)
Method:
  • Heat coconut oil in a large skillet, over medium high heat.
  • Add the onions and cook until softened and turning brown.
  • Add the green beans and the spritz of water. Cook until the beans are browned and just tender.
  • Add the garlic and saute for another minute. Season with salt/pepper and squeeze on some lemon juice.
  • Enjoy!
I know I only gave the recipe for the green beans. I figured that since it was the "new" item here, I'd feature it. I love green beans! The onions get all caramelized and slightly sweet. The garlic has a little bite and the lemon makes it nice and bright. This is an excellent way to eat your beans!

The side pork recipe can be found here. I just changed up my spice blend to include cumin, coriander, garlic powder, onion powder, cayenne pepper, salt, pepper, cinnamon, oregano and cocoa powder. The recipe for the biscuits can be found on the Empowered Sustenance website. I used coconut oil for the lard. These little biscuits are supremely tasty!

For anyone out there that complains about cooking being hard... I was able to do all this, with no help from Justin, on a bum leg! It's easy!!

Sunday, May 5, 2013

Pancakes!

This morning marked the longest run I've done to date: 2 hours and 45 minutes. I think I did about 18 miles total. All I keep thinking about is how I'm almost there. I just have three more weeks until the Buffalo Marathon. Three weeks, the race and then I'm done. No more marathons... I feel as though the stress of running all those miles, both on my body and my mind, is more than I care to do again. I'm happy that I've come this far and excited for the race itself. There's light at the end of the tunnel!

Anyways, after running all those miles, I wanted something that I haven't had it quite some time: pancakes. I know I posted a while back about some banana/almond butter concoction that didn't really work out so well. I have since found a recipe that's Paleo and works!

Gelatin Coconut Flour Pancakes


I used this recipe, by Lauren Geertsen, of Empowered Sustenance. She has an amazing site and some really wonderful recipes!

Ingredients:
  • 2 tbsp coconut flour
  • 1/2 tbsp grass-fed gelatin
  • 2 eggs, at room temperature
  • 1/2 heaping tbsp coconut oil, melted
  • 1/4 cup coconut milk
  • a pinch of salt
  • ~1/8 tsp cinnamon
  • Coconut oil, for the pan
Method:
  • Heat a large skillet over medium heat. 
  • Whisk together the coconut flour and gelatin (I just used a fork). 
  • Add the eggs and stir until the mix is smooth.
  • Add the coconut oil and stir until combined.
  • Add the coconut milk and stir again.
  • Add the coconut oil to the hot skillet.
  • Spoon out a small amount of the batter into the skillet (I used a couple tablespoons per pancake and ended up with 5 altogether). Cook until the edges are opaque and the center starts to look the same way. Flip and cook for another couple of minutes, or until the underside is golden brown.
  • Serve with some maple syrup or honey or whatever you like!
I will admit that I made this recipe pretty much directly as written by Lauren (please check out her site!) I just added a touch of cinnamon and made a half batch. I'm so excited to finally find a good, Paleo friendly pancake recipe that doesn't call for nut flours and doesn't fall apart! I never thought to use gelatin in a pancake, but it totally works.

Let me just say that these are TASTY! They're not sweet like you might think with a typical pancake. They remind me more of a crepe, with a slight coconut flavor. I topped mine with a little pure maple syrup and served them with some avocado, some leftover collard greens cooked with ham hocks and some wild boar pate. There's a little bit of everything in this breakfast, but it's so worth it just for the pancakes!

Monday, April 29, 2013

I love breakfast!

Yesterday morning, I was up bright and early to run the Flower City Challenge Half Marathon. I managed to finish in a solid 2:06:45 (not so bad when you consider my training regimen). The weather was perfect for this type of race: not too hot, sunny and a light breeze. Plus, the various neighborhoods came out in droves to support all those who ran. It's times like these that I think Rochester is a pretty fine place to live.

Needless to say, my hard work from yesterday warranted a little time off today.  I get a chance to sleep in, rest up and make a fabulous little breakfast plate!

Monday Breakfast


Ingredients:
  • 2 slices of bacon
  • 4 slices of liverwurst
  • 2 egg yolks (you could use two whole eggs, if desired)
  • 1/2 apple cut into small wedges
  • sauerkraut
  • spicy brown mustard
  • salt/pepper, to taste
Method:
  • Heat a medium pan over medium high heat.
  • Cook the slices of bacon until crisp and set aside.
  • Put the slices of liverwurst in the heated pan with bacon grease and cook until browned on both sides (about 1 1/2-2 minutes per side). Set aside on a plate.
  • Pour the egg yolks into the pan, taking care not to break them. Cook for a minute or until the bottom is set. Carefully flip them over (mine broke at this point, but they still taste good). Cook until they reach your desired doneness. 
  • Place the egg yolks over the cooked liverwurst and season with salt/pepper. Squeeze on a little spicy brown mustard. 
  • Serve with the bacon slices, apple wedges and a some sauerkraut.
This yummy breakfast is fantastic! The liverwurst is slightly crisp on the outside and creamy on the inside. It's a perfect complement to the eggs and sauerkraut. The mustard adds some spicy goodness and the apple a touch of sweet. Throw in the bacon and voila! BREAKFAST!


Monday, April 15, 2013

Bright and sunny food for bright and sunny weather!

Today got off to a bit of a slow start. I didn't sleep so well last night, so I was fairly tired for most of the work day. I tried to keep my chin up, though, because I knew the day could only get better. The sun was out and it's finally beginning to look like spring in this dreary city.

Nice weather means I can switch to wearing shorts on runs and has the potential for there to be some running in my afternoon CrossFit metcon. This afternoon's WOD proved my little prediction right. The skill portion of the workout consisted of: 16 minutes, on the minute, of 3 snatch balances and 5 hands off push ups. (I managed to do 35 lbs for the weight. It's not very heavy, but I tried to tell myself that I was concentrating on perfecting my form and not trying to be like Heman...) This was followed by the metcon of: a 200 m run, 15 dead lifts, 20 sit-ups, 400 m run, 10 dead lifts, 20 sit-ups, 800 m run, 4 dead lifts and 20 sit-ups, all for time. I ended up doing everything in 11 minutes 26 seconds, and the dead lifts at 85 lbs. 

Needless to say, all this running and lifting left me somewhat drained. I came home and was heating up some leftovers for dinner and thought, "Hey, this recipe is totally worth sharing." It's a different take on a previous one, but it's quite tasty:

Lemon Ginger Pulled Pork

(Doesn't that look succulent?)

Ingredients:
  • 6-7 lbs bone in pork butt
  • 1 onion, roughly chopped
  • 6 cloves garlic, minced
  • 1 2-2 1/2" piece of ginger, minced
  • zest of 1 lemon
  • 1 lemon, quartered (I used the zested lemon)
  • 1 tbsp salt
  • 1 tbsp pepper
  • 1/4 tsp ground mace, optional
  • 1/2 tsp ground mustard, optional
Method:
  • Combine the salt, pepper, ground mace and ground mustard in a small bowl. Rub this mixture all over the pork.
  • Combine the onion, garlic, lemon zest and ginger, in another bowl. Place have of this mix into the bottom of a slow cooker. Place the seasoned pork shoulder on top. Pour the remaining onion/garlic/ginger mix on top of the pork. Squeeze a little of the juice from the quartered lemon on top of the pork and place them around the roast.
  • Cook on high for 5-6 hours and then cook on low for an additional 3-4 hours, or until the pork is easy to shred.** Taste, adjust any seasonings.
  • Enjoy!
**Note** I find that this recipe works the best with the high then low cooking method. I've cooked pork on low all day and found that it's not always easy to shred. (Granted, this could be because it was a 7.5 lb roast in a little crock-pot...) Starting high and then switching to low seems to be fool-proof. You'll barely have to touch the pork to pull it apart, it's that tender.

This pulled pork ROCKS!  It's a little spicy from the ginger and citrusy from the lemon. You might think that these two flavors would overpower, but they work beautifully. I'm not sure the mace and mustard powder added too much to the recipe (hence the 'optional'...) Feel free to add some red pepper flakes to this to kick up the heat. You'll truly enjoy this porky dish! 

Monday, April 8, 2013

My Fave Side Dishes!

I made it to a new milestone this past weekend. I ran for 16.2 miles! I'll admit that I was a little stiff and sore afterwards, but I did it. Plus, I had a fairly intense CrossFit WOD today: The warm up consisted of  two rounds of 400 m run, 10 sit-ups, 10 hands off push-ups, and 20 mountain climbers. This was followed by the Metcon, which was 5 rounds of 250 m rowing, 10 slam balls (15#) and 10 wall balls (I did 10#. I can do 14 but have to take it easy with my hip strain). The strength/skill portion was 15 minutes, on the minute, of 3 burpees and 3 hang power cleans (the rx for the power cleans was 90 lbs, yet I'll take my fairly decent 55 lbs). All in all, I'm making some serious progress with my workouts.

Anyways, all this exercising leaves me hungry for some good grub! I know I seem to go on about how I love my meat... and I do. But I thought that this time I'd  share my two favorite side dishes:  garlic & rosemary mashed sweet potatoes and roasted asparagus. Both are simple and oh so delicious!


Garlic & Rosemary Mashed Sweet Potatoes


Ingredients:
  • 3-4 sweet potatoes, cut into 1/2" cubes
  • 6-8 cloves garlic, roughly chopped
  • 2 sprigs rosemary
  • water
  • coconut oil (or butter)
  • salt/pepper, to taste
Method:
  • Put the sweet potatoes and garlic in a large pot and pour in enough water to just cover them. Add the two sprigs of rosemary.
  • Turn the heat to high and bring up to a boil. Reduce the heat and boil until the sweet potatoes are tender, ~20 minutes. You'll know they're done when you can pierce a cube with a fork and the potato slides off.
  • Drain the potatoes/garlic/rosemary and pour back into the pot with a little bit of water. Use your fingers to strip off the rosemary leaves if need be. 
  • Use a hand blender or a potato masher to mash everything together. Add ~1 tbsp coconut oil/butter (or 1 1/2 if you're like me and are addicted to the stuff), salt and pepper to your taste.
  • Enjoy!

Roasted Asparagus 


Ingredients:
  • 1 bunch asparagus
  • 1 tbsp melted coconut oil
  • 1 tsp garlic powder
  • salt/pepper, to taste
Method:
  • Preheat the oven to 375 degrees Farenheit.
  • Spread out the asparagus on a rimmed baking sheet. Pour on the coconut oil, garlic powder, salt and pepper. Use tongs to toss the asparagus until it's evenly coated.
  • Bake for 20 minutes, or until the asparagus is browned and tender.
The nice thing about these recipes is that they're very simple and easy to cook! I know the mashed sweet potatoes take a little more effort, but the flavor alone totally make up for it. The potatoes are sweet and flavorful with the herby rosemary. The asparagus is crispy and a little salty. The two of these together make a great set of side dishes!


Monday, April 1, 2013

Sarah had a Little Lamb

Today turned out to be a little different than what I'd planned. I was all set to go to work, go to CrossFit, come home and eat some dinner. I ended up leaving work early due to some tummy troubles, resting and doing a little yoga to try and re-center myself. I chalk it up to the stress of marathon training, doing CrossFit, writing the blog and just generally trying to fit too many things into a 24 hour period. I rarely give myself a true rest day and now my body's trying to tell me that enough is enough!

Needless to say, my stomach is doing better and has graciously allowed me to continue making some oh so tasty dinner. I was a little inspired by Sunday being easter and all, so I decided to try my hand at some lovely lamb goodness. I will admit that I think it's imperative to use a high quality, grass fed lamb source. There was a vendor at the public market this past weekend with some excellent roasts, chops and loins. I can't remember the name off-hand, but I'll be sure to give them a shout-out in the comments!

Anyhoo, I give you:

Crock Pot Lamb and Broccoli


Ingredients:
  • 2-3 lb boneless lamb roast
  • 4 large cloves garlic, minced
  • 1 onion, chopped
  • 1/4 tsp safflower
  • ~2 tsp "fine herbs" blend
  • 1 1/2-2 tsp salt (use your preference)
  • 1-2 tsp pepper (again, use your preference or none at all for strict autoimmune)
  • 1 cup bone broth
  • 1 bag frozen broccoli, thawed
Method:
  • Mix together the safflower, fine herbs, salt and pepper, in a small bowl.
  • Rub the seasoning mix all over the lamb roast.
  • Place the roast in the crock pot and pour in the broth. Cook on low for 6-8 hours (I cooked mine for 8 total).
  • About a half an hour before the roast is done. Take it out of the crock pot and cut it into small pieces. Add it back to the crock pot and add the thawed broccoli. Cook for the remaining half and hour on low (or basically until the broccoli is no longer crisp and everything is warm).
  • Enjoy with your favorite side dish! I served mine with roasted carrots.
Boy am I ever so happy that my tummy started to feel better! This meal turned out to be delicious! The lamb is melt in your mouth tender and very flavorful (and it wasn't at all gamey). There's just the right amount of herbs and a nice complexity with the safflower. Feel free sub out any other veggies for the broccoli in the recipe. You will not be disappointed one bit!

Monday, March 25, 2013

Pork-y Goodness!

This past weekend I was on yet another mission to try a new cut of meat. I perused my farmer's meat list and finally rested my eyes upon: side pork. I did a little research, as is my usual habit, and found out that this cut is similar to pork belly, but is higher up on the side of the pig. It has a fair amount of fat, but not as much as pork belly.

I did some more research on the interwebs to find my inspiration. (I swear I spend hours pouring over online recipes to find which is the best to suit my tastes and skills. I keep telling Justin that I should start a recipe consulting firm. Who needs Google or All Recipes... just use me!) Apparently, side pork can be treated just like pork belly.

I settled on this particular jewel from The Clothes Make the Girl. (Quick aside, Melissa has an awesome recipe site. She also has a great Paleo cookbook called Well Fed.)

Roasted Side Pork

  
Ingredients:

  • 2-3 pounds side pork
  • 2 tsp salt
  • 1 tsp black pepper
  • 2 tsp garlic powder
  • 1 tsp onion powder
  • 1/2 tsp cinnamon
  • 1/4 tsp ground cloves
  • 1/4 tsp powdered ginger
  • fresh lemon juice
Method:


  • Pat the side pork dry with a paper towel. Using a sharp knife, score the fatty/skin side.
  • Combine the salt, black pepper, garlic powder, onion powder, ginger, cinnamon and cloves, in a small bowl. Rub the mixture all ober the pork, making sure to rub some into the score marks. Put the pork in a gallon sized plastic bag, try to push out as much of the air as possible, seal and put it the fridge. Let marinate from 2 hours to overnight.
  • Preheat the oven to 425 degrees Farenheit. Line a roasting pan with tin foil or parchment paper. Take the pork out of the fridge and place, skin/fat side up, in the pan. Spritz the pork with fresh lemon juice. Put in the oven and cook for 30 minutes.
  • Reduce the heat to 350 degrees and let the meat cook for an additional hour, or until the pork is well browned and the skin is crispy. Remove from the oven and let it rest for 5-10 minutes. (It should be 10, but Justin and I couldn't wait to dig in...) Cut the meat up and serve with your favorite side.
  • Enjoy!
I must say that this is absolutely FANTASTIC! It's like eating a more hearty version of bacon. The skin is perfectly crispy and the meat itself is fatty and delicious. The lemon juice adds just a little bit of acid to cut through the fat. We served ours along with some zucchini fritters.

If you're afraid of fat, than this dish is not for you. However, I encourage you to indulge in this recipe for a wonderful treat! More and more studies are coming out stating that a higher fat diet is good for your. So eat your pork fat!